There’s something satisfying about ending the year with a table full of craft supplies and something pretty taking shape in front of you. Maybe you’re making decorations for a New Year’s Eve party, planning a relaxed craft night with friends, or looking for a quiet project to work on while a movie plays in the background.
These New Year’s crafts for adults include sparkling party decorations, handmade accessories, and thoughtful projects to carry into January. Some come together with paper and ribbon; others give you an excuse to pull out the paint, beads, or sewing supplies. Choose one that fits your evening—you don’t need to turn the whole house into a craft studio.
Heads up: This post may include affiliate links. As an Amazon Associate, I earn from qualifying purchases—at no extra cost to you. Full privacy policy and disclosure here.
Sparkly New Year’s Eve Decorations
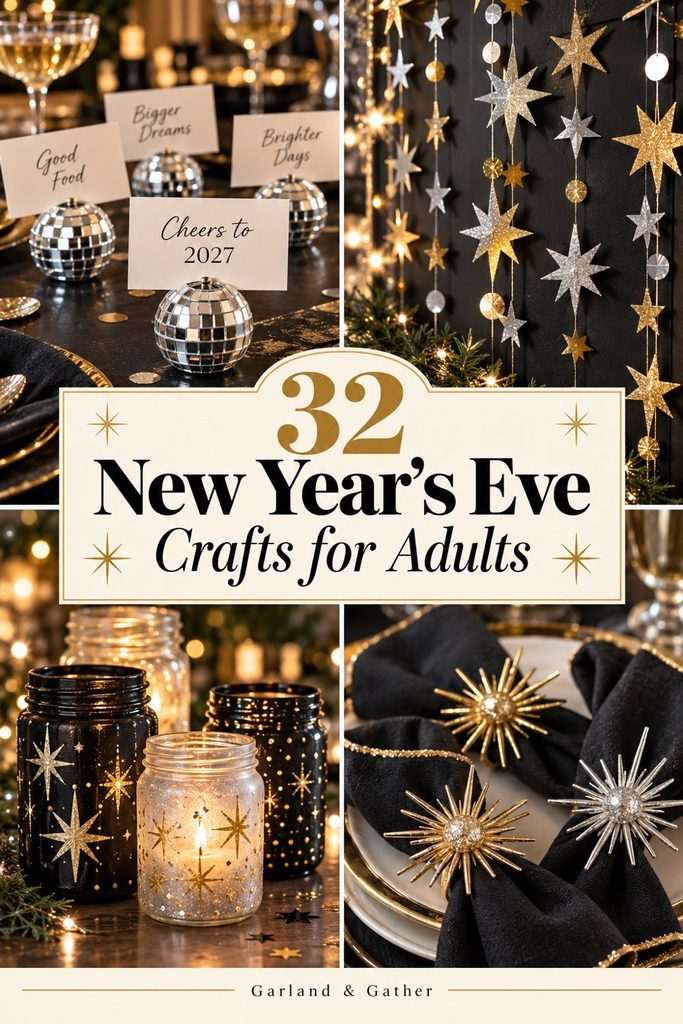
1. Mini Disco Ball Place Card Holders

A tiny disco ball at each place setting makes even a simple dinner table feel ready for midnight. Silver looks classic, but gold or pink mirror tiles work beautifully with a softer party palette.
Supplies: Small flat-bottom foam balls, self-adhesive acrylic mirror tiles, craft wire, pliers, cardstock, and glue suitable for foam.
How to make it: Cover each ball with mirror tiles, leaving the flat base uncovered. Twist a short piece of wire into a small double loop, leaving a straight stem below it. Add a dab of glue to the stem, push it into the top, and let it set before slipping a name card into the loop.
2. Metallic Paper Star Garland
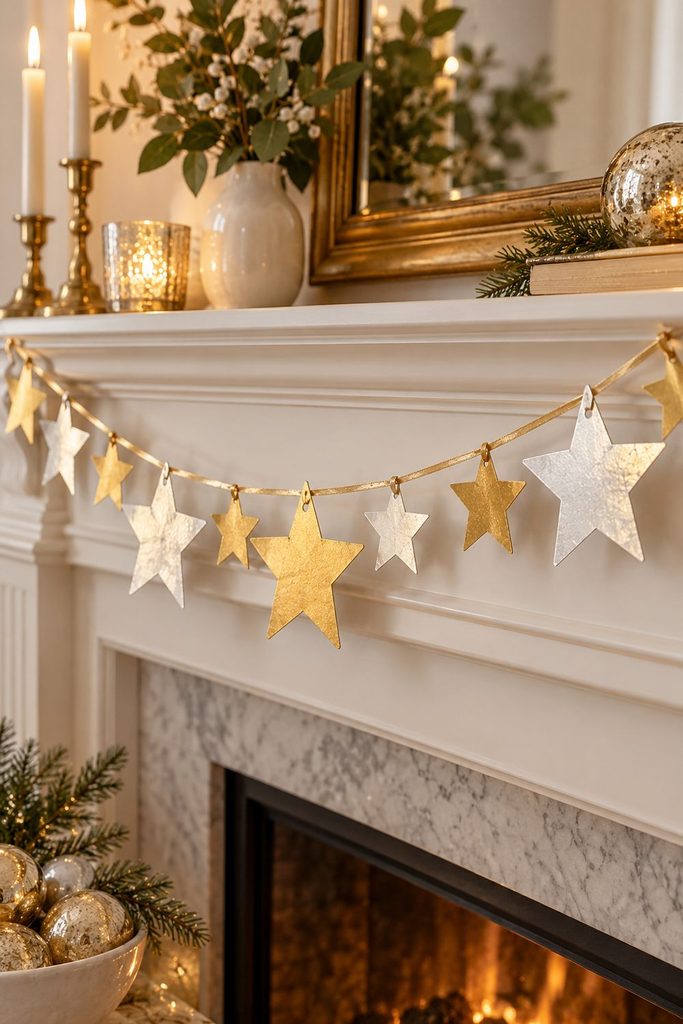
Hang this garland across a mantel, above the snack table, or behind your party drinks. Mixing large and small stars gives it movement without needing lots of extra decorations.
Supplies: Metallic cardstock, a star template, scissors, a hole punch, and thin ribbon or twine.
How to make it: Trace and cut stars in two or three sizes. Punch two small holes near the top of each star and thread them onto the ribbon so they stay facing forward. Leave a little space between stars, then hang the garland with removable hooks.
3. Painted New Year Number Display

Oversized year numbers give you a focal point for an entry table or photo backdrop. Use the upcoming year and choose a finish that matches your celebration: matte black, brushed gold, or silver with a few sparkling accents.
Supplies: Freestanding papier-mâché number forms, acrylic paint, brushes, craft glue, and optional sequins.
How to make it: Paint the numbers with thin, even coats, allowing each coat to dry. Add sequins along one edge or around the base rather than covering every surface. Let the decorations set before arranging the numbers on a stable shelf or table.
4. Confetti Shadow Box

This framed craft brings the look of a confetti toss to a shelf without scattering paper around the room. A small “Cheers to a fresh start” message keeps it useful beyond one specific year.
Supplies: A shadow box frame, cardstock, metallic paper confetti, letter stickers, and glue.
How to make it: Cut cardstock to fit the frame backing and add your message with letter stickers. Glue a few confetti pieces around the words, then add a small handful of loose confetti to the bottom of the box. Close the frame securely and stand it upright.
5. Tissue Paper Tassel Garland

Black, ivory, and gold tassels make a striking party backdrop. If you prefer something lighter, try blush, white, and champagne-colored tissue paper.
Supplies: Tissue paper, scissors, string, and clear tape.
How to make it: Fold a tissue paper rectangle in half and cut fringe from the open edge, leaving an uncut band along the fold. Unfold it, roll along that center band, then twist the middle into a loop. Secure the loop with tape and thread it onto string. Repeat until the garland fits your space.
6. Ribbon-Wrapped New Year’s Wreath

A ribbon wreath is an easy way to give the front door a fresh look after Christmas. Keep the base neutral and attach the New Year’s details with wire so you can swap them out later.
Supplies: A foam wreath form, wide ribbon, floral pins, craft wire, paper stars, and a small “Happy New Year” sign.
How to make it: Wrap ribbon around the form, slightly overlapping each pass, and pin the ends at the back. Wire a cluster of stars and the sign onto one side. Add a hanging loop at the top and display the wreath indoors or on a sheltered door.
7. Paper Fan Photo Backdrop
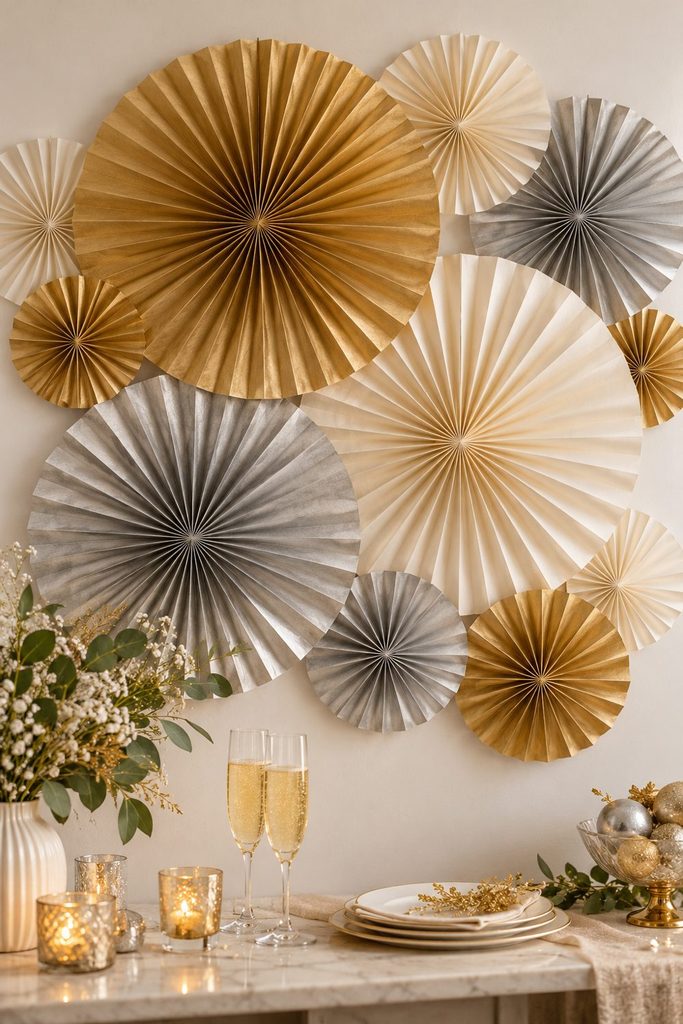
Large paper fans fill a blank wall quickly and look lovely in party photos. Use three coordinating colors and vary the sizes for a layered arrangement.
Supplies: Paper, scissors, glue, a stapler, and removable wall hooks or mounting strips.
How to make it: Accordion-fold two matching paper rectangles. Fold each strip in half and join the inner edges to make two half circles, then glue the halves together into a full fan. Secure the centers and arrange the finished fans close together on the wall using mounting products suitable for your wall finish.
8. Painted LED Candle Jars
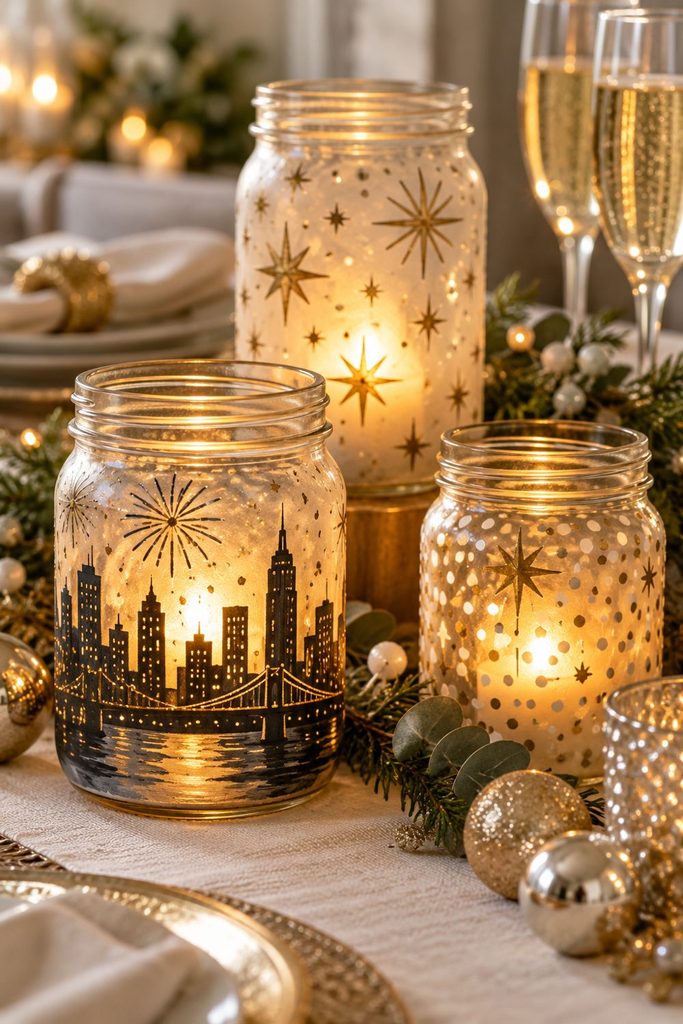
Soft light through painted glass makes a cozy centerpiece for a New Year’s Eve dinner. Tiny dots, stars, or a simple city skyline give the jars a festive finish.
Supplies: Clean glass jars, paint intended for glass, small brushes, and battery-operated LED candles.
How to make it: Wash and thoroughly dry the jars. Paint a light pattern on the outside, leaving enough clear space for the light to show through. Follow the paint’s drying or curing directions, then place an LED candle inside each jar. Arrange several jars at different heights along the table.
Handmade Touches for the Party Table
9. Beaded Glass Charms
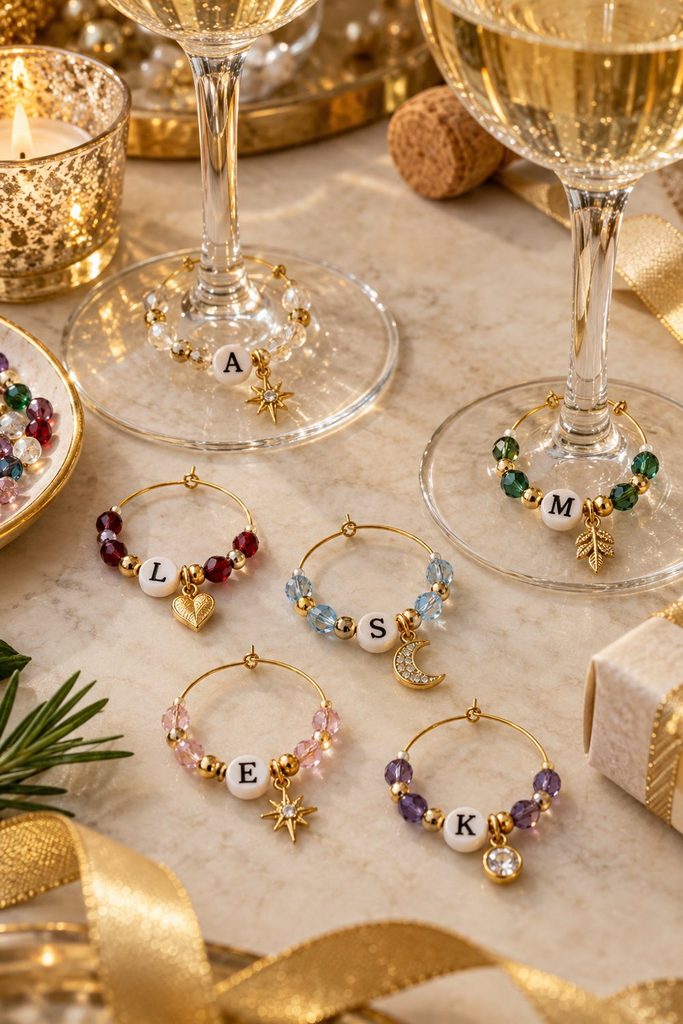
Give each guest’s glass its own little personality with a beaded charm. Different colors make drinks easier to recognize, and a single initial bead adds a personal touch.
Supplies: Wine glass charm hoops, small beads, letter beads, and jewelry pliers.
How to make it: Open each hoop and slide on a short arrangement of beads. Leave room for the clasp to close freely. Bend the end back into position with pliers if needed, then loop the charm around the stem of a glass. Package extra sets as small hostess gifts.
10. Clock Face Coasters

Coasters decorated like clocks are a playful nod to the countdown. Black clock hands on a white background keep the design readable, with gold around the edge for a little shine.
Supplies: Unfinished wooden coasters, acrylic paint, a fine paint pen, and a protective finish intended for painted wood.
How to make it: Paint the coaster faces and let them dry. Mark the clock positions, add the numbers, and draw hands pointing just before midnight. Paint the edges, then apply the protective finish according to its directions. Allow it to cure fully before setting glasses on the coasters.
11. Stamped Fabric Cocktail Napkins
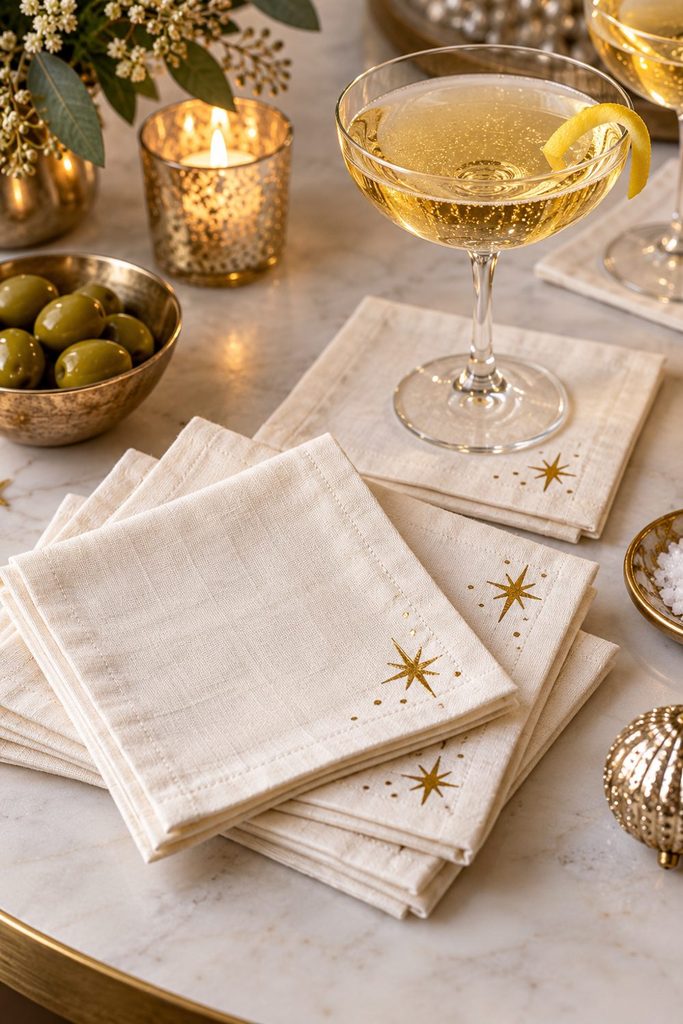
Reusable cocktail napkins feel special without needing an elaborate design. A small star stamped in one corner or a row of dots along the edge is enough.
Supplies: Plain cotton napkins, fabric paint, foam stamps, scrap cardboard, and an iron if required by the paint.
How to make it: Wash and dry the napkins first. Place cardboard beneath the fabric, apply a thin layer of fabric paint to the stamp, and test it on a scrap before stamping the napkins. Let the design dry and heat-set it if the manufacturer requires it. Follow the paint’s instructions before the first wash.
12. Starburst Napkin Rings
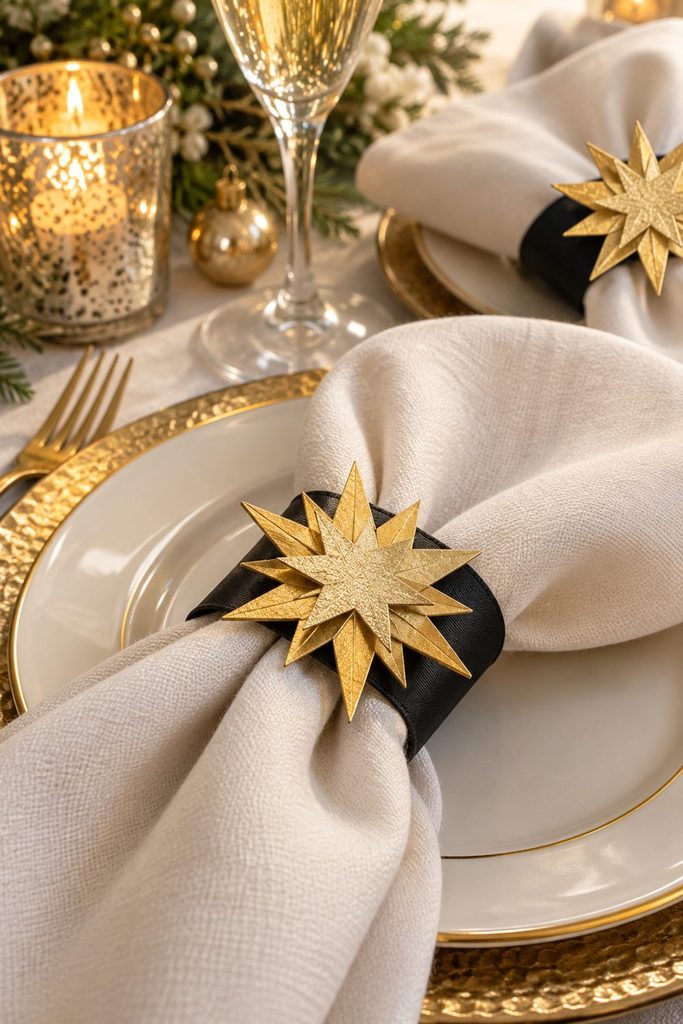
These little starbursts dress up plain cloth napkins and store flat enough to reuse next year. Try gold stars over black ribbon for a bold place setting.
Supplies: Cardstock, star templates, scissors, wide ribbon, craft glue, and hook-and-loop dots.
How to make it: Cut one large star and one smaller star for each ring, then glue them together with the points offset. Cut ribbon long enough to wrap loosely around a folded napkin. Attach hook-and-loop dots to the ribbon ends and glue the star cluster over the front of the band.
13. Folded Countdown Place Cards

Turn place cards into conversation starters by adding a question inside each one. Guests can share a favorite memory, an unexpected win, or something they’re looking forward to.
Supplies: Heavy cardstock, a ruler, scissors, metallic pens, and optional star stickers.
How to make it: Cut equal rectangles and fold them into tent cards. Write each guest’s name on the front and a conversation prompt inside. Add a small clock or star detail in one corner, keeping the name easy to read.
14. Mini Party Favor Boxes
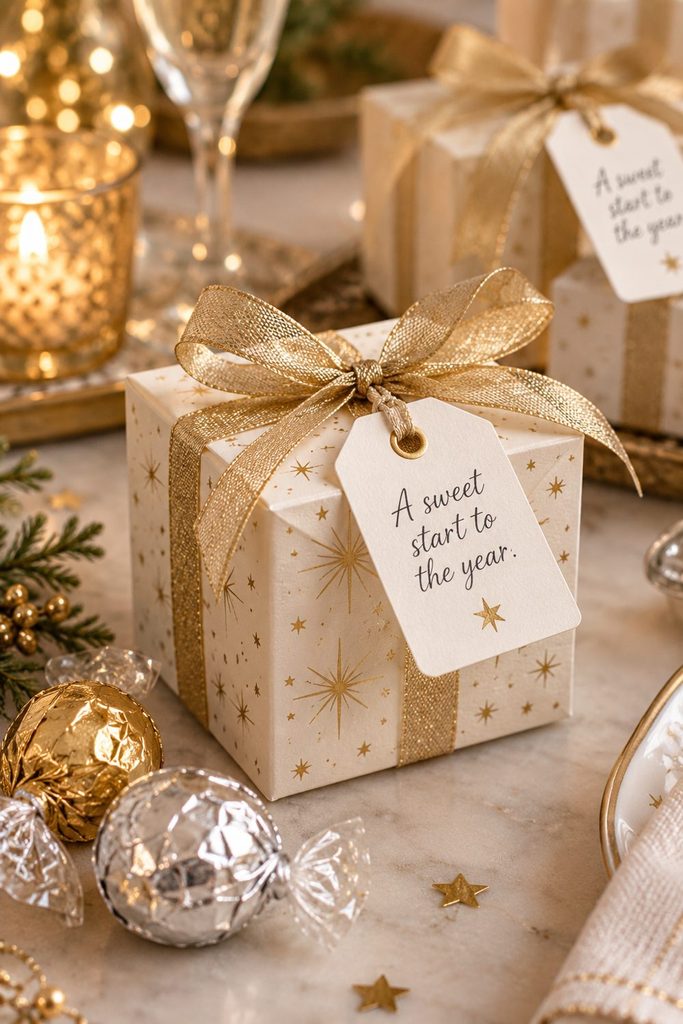
A tiny handmade favor box makes a thoughtful final touch for the table. Fill it with wrapped chocolates, a tea sachet, or a handwritten wish for the coming year.
Supplies: Blank favor boxes, ribbon, cardstock tags, a hole punch, and individually wrapped treats.
How to make it: Assemble the boxes and add your chosen favors. Cut small tags and write a short message such as “A sweet start to the year.” Punch a hole in each tag, tie it onto a ribbon, and wrap the ribbon around the closed box.
15. New Year’s Wish Tree

A wish tree doubles as a centerpiece and an activity for guests. By the end of the evening, its branches are filled with small hopes, plans, and good wishes.
Supplies: A sturdy vase, clean dry branches, pebbles, cardstock tags, ribbon, and pens.
How to make it: Anchor the branches in a vase with pebbles, checking that the arrangement won’t tip. Cut tags, thread ribbon through the tops, and place them beside the tree with pens. Invite guests to write a wish and hang it from a branch. Keep taller branches away from faces and busy walkways.
16. Decorated Bottle Gift Bags

Dress up a bottle of sparkling wine, cider, or flavored syrup with a handmade bag. This is a useful craft if you’re heading to someone else’s New Year’s gathering.
Supplies: Plain paper bottle bags, metallic markers, cardstock, ribbon, and glue.
How to make it: Lay the bag flat and draw scattered stars or a simple line pattern on the front. Add a cardstock label with a message such as “Something to toast with.” Let everything dry, place the bottle inside, and tie a ribbon around the handles.
New Year’s Eve Accessories and Craft Night Projects
17. Velvet Ribbon Party Crowns
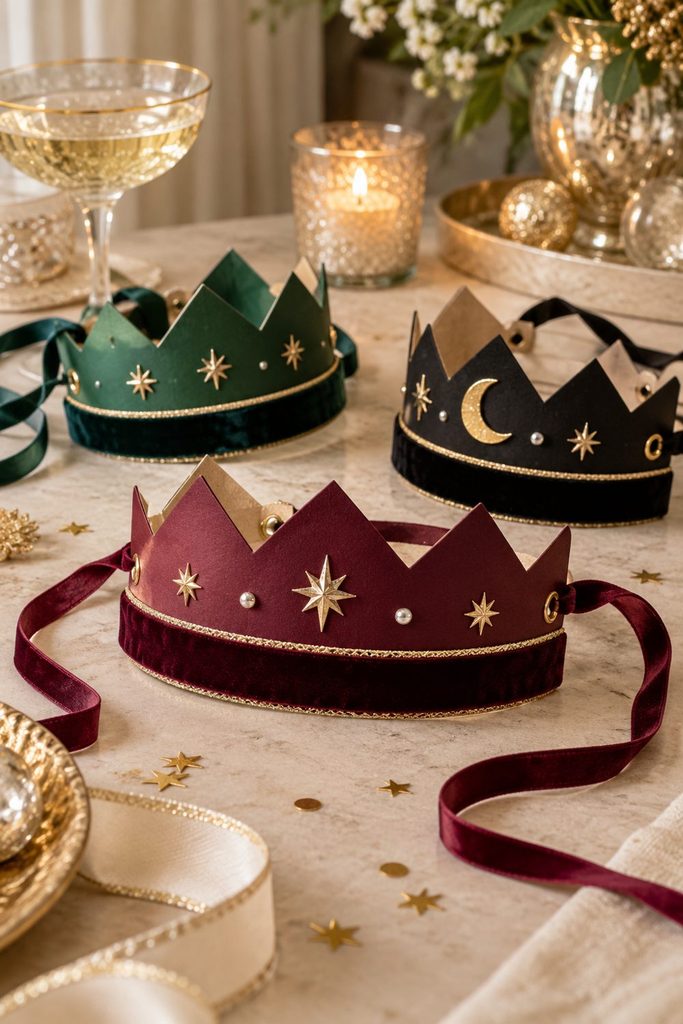
A ribbon-trimmed crown feels a little more dressed up than a paper party hat. Deep green, burgundy, or black velvet pairs nicely with a slim metallic edge.
Supplies: Cardstock, scissors, velvet ribbon, craft glue, a hole punch, and narrow tying ribbon.
How to make it: Cut a short crown shape that will sit across the front of the head. Glue velvet ribbon along the bottom edge and add a few small metallic details. Punch a hole at each end and attach narrow ribbons so the crown can tie comfortably at the back.
18. Starry Hair Clips

A cluster of little stars adds sparkle to a bun, braid, or loose waves. Make a matching pair or one larger clip to wear on the side.
Supplies: Flat hair clip blanks, lightweight star embellishments, felt, scissors, and adhesive compatible with the materials.
How to make it: Arrange the stars on a small felt backing before gluing anything down. Attach the stars, trim away visible felt, and secure the cluster to the flat top of the clip. Leave the hinge and gripping surfaces clear, and let the adhesive cure completely before wearing.
19. Beaded Word-of-the-Year Bracelets
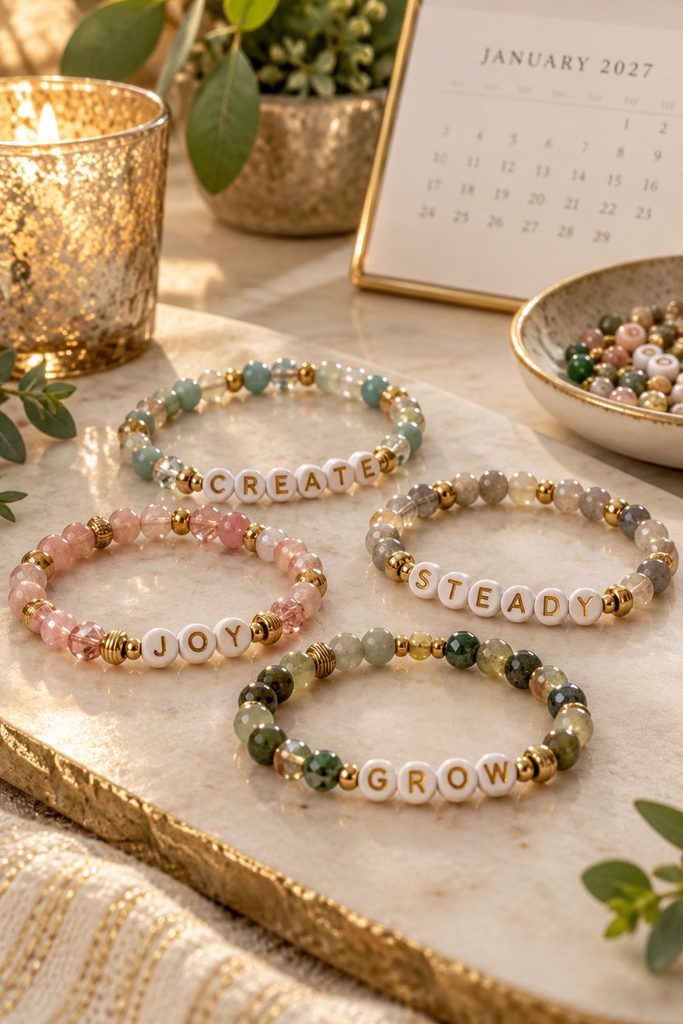
Choose a word you want to carry into January—perhaps “create,” “steady,” “joy,” or “grow”—and turn it into a bracelet. This makes an especially easy group activity because everyone can choose their own colors and message.
Supplies: Stretch jewelry cord, letter beads, accent beads, scissors, and jewelry adhesive suitable for elastic.
How to make it: Measure the cord around your wrist and leave extra length for tying. String the word beads first, then add accent beads on either side. Tie a secure knot following the cord manufacturer’s guidance, add compatible adhesive if recommended, and let it cure before trimming the tails.
20. Midnight Photo Booth Props
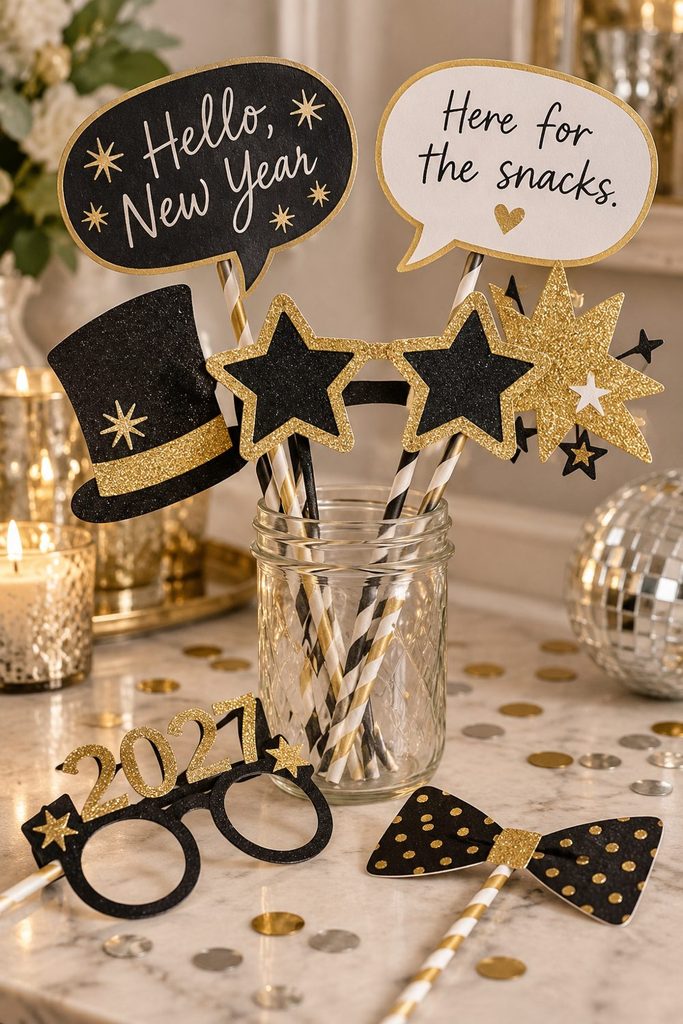
Give guests something fun to hold in photos with handmade stars, speech bubbles, and oversized glasses. A few well-made props are easier to use than a basket overflowing with tiny pieces.
Supplies: Heavy cardstock, pencils, scissors, paint pens, paper straws, and strong craft tape.
How to make it: Sketch simple shapes and cut them out. Add short phrases such as “Hello, New Year” or “Here for the snacks.” Tape a paper straw securely to the back of each prop, then place them in a jar near a clear photo area.
21. Hand-Painted Party Masks
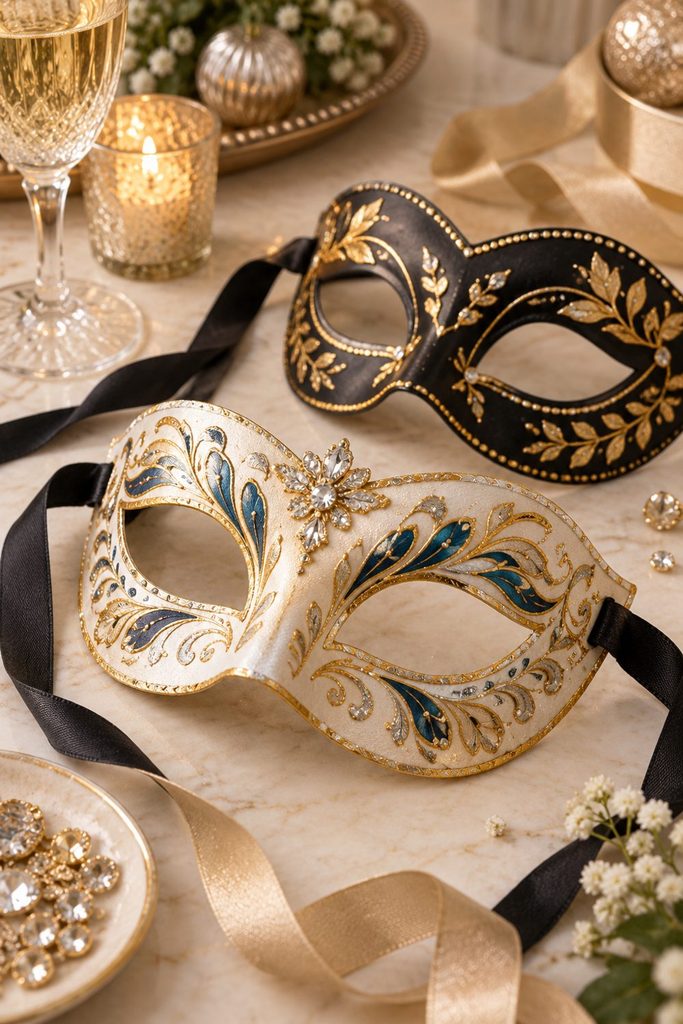
For a masquerade-style celebration, paint your own mask in a palette that works with your outfit. Metallic lines and a few small gems can be more striking than covering the whole surface.
Supplies: Blank craft masks, acrylic paint, brushes, ribbon, and lightweight embellishments.
How to make it: Paint the mask’s outer surface and let it dry. Add details around the edges, keeping eye openings and the inside surface clear. Attach ribbons at the sides, let any adhesive cure fully, and check that the mask fits comfortably without blocking your view.
22. New Year’s Embroidery Hoop Art
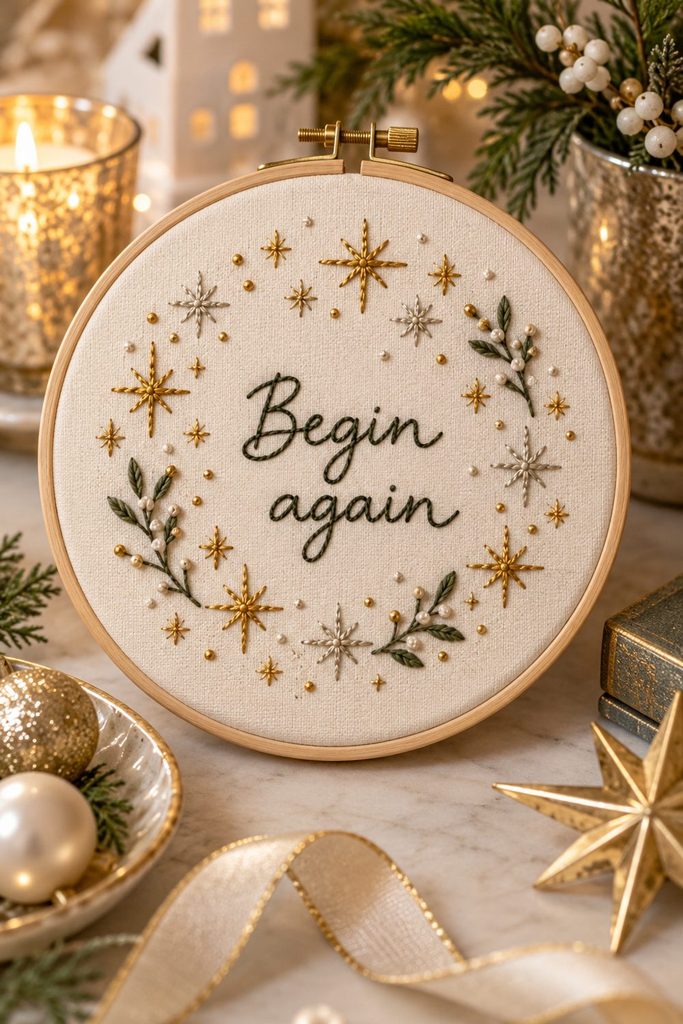
A small stitched phrase makes a lovely winter project and a keepsake you can display all year. “Begin again” or “Make room for joy” works well inside a simple border of stars.
Supplies: An embroidery hoop, cotton fabric, embroidery floss, a needle, scissors, and a washable fabric pen.
How to make it: Stretch the fabric in the hoop and lightly sketch your phrase. Backstitch the letters, then add small straight-stitch stars around the words. Remove the fabric markings according to the pen’s directions, let the fabric dry, and finish the excess fabric neatly behind the hoop.
Meaningful Crafts for a Fresh Start
23. Good Things Memory Jar

Keep a record of the small things that would otherwise slip away: a funny conversation, a lovely afternoon, or a moment when something finally clicked. The jar becomes more meaningful as the year goes on.
Supplies: A clean jar with a lid, paper slips, a pen, ribbon, and a label.
How to make it: Decorate the jar with a simple label and ribbon around the neck. Cut a stack of paper slips and keep them nearby with a pen. Add your first memory on New Year’s Day, then keep adding notes whenever something good happens. Read them at the end of the year.
24. Personal Vision Board

A vision board can focus on how you want daily life to feel, along with bigger hopes. Leave room for ordinary pleasures such as more reading, regular walks, or time with friends.
Supplies: A corkboard or sturdy poster board, magazines, printed photos, scissors, glue or pins, and a pen.
How to make it: Choose three or four areas you want to focus on. Gather images and words for each, arrange them before attaching, and leave some open space. Add one realistic next step beside each theme so the board gives you something to act on.
25. Year-in-Review Accordion Album

This little album is a good home for favorite photos that are still sitting on your phone. You can display it open on a shelf or tie it closed with ribbon.
Supplies: Heavy paper, printed photos, scissors, photo-safe adhesive, pens, and ribbon.
How to make it: Fold a long strip of heavy paper into equal accordion panels. Join extra strips at the ends if needed, leaving room for the folds to move. Add one photo and a short caption to each panel. Finish with slightly larger cardstock covers and a ribbon closure.
26. Decorated New Year Journal

A plain notebook becomes more inviting with a cover you actually like. Choose colors, patterns, and a title that make you want to open it, whether you’re using it for plans, sketches, or everyday notes.
Supplies: A plain notebook, decorative paper, washi tape, scissors, a glue stick, and letter stickers.
How to make it: Cover the front with decorative paper, trimming it slightly smaller than the cover so the edges won’t catch as easily. Add a title and reinforce the paper edges with washi tape. Leave the spine flexible, then write a simple opening prompt on the first page.
27. Handmade Desk Calendar

A small desk calendar gives you twelve little spaces to paint, doodle, or decorate. Keep the date grids clear and save the artwork for the top or outer border.
Supplies: Heavy cardstock, verified calendar grids for the upcoming year, a small easel, glue, and drawing supplies.
How to make it: Cut twelve matching cards and attach one month’s grid to each. Check the dates and weekdays before decorating. Add a small illustration or pattern, then stack the cards on the easel with the current month at the front.
28. Air-Dry Clay Intention Tokens

A small clay token can hold a word, symbol, or reminder for the year ahead. Keep one beside your journal or on a desk where you’ll see it during the day.
Supplies: Air-dry clay, a rolling pin, small cutters, letter stamps, acrylic paint, and optional clay-compatible sealer.
How to make it: Roll the clay to an even thickness and cut small circles or ovals. Stamp a short word into each piece and smooth the edges. Dry the tokens according to the clay’s directions, turning them if instructed. Paint the lettering and seal if desired. These are decorative pieces rather than dishes for food.
29. Reading Goal Bookmarks

If reading more is on your list, start with a bookmark that makes the next chapter feel inviting. You can include a short reading wish or a few blank spaces to record favorite titles.
Supplies: Cardstock, markers, patterned paper, glue, a hole punch, and thin ribbon.
How to make it: Cut a narrow cardstock rectangle and decorate one side. On the back, write a gentle reading goal or draw a small row of books to color in as you finish them. Punch a hole at the top and add a short ribbon tassel.
30. New Year’s Time Capsule Box

Make a snapshot of life right now with a box you’ll open next New Year’s Eve. The everyday details—favorite songs, current routines, and what you’re excited about—often become the most interesting parts later.
Supplies: A sturdy lidded box, paper, photos, small keepsakes, envelopes, and decorating supplies.
How to make it: Decorate the box and write an opening date on the lid. Add a letter to your future self, a few photos, and a list of current favorites. Slip personal notes into envelopes, then store the box somewhere dry where you’ll remember to find it.
31. Monthly Adventure Envelopes

Give yourself something to look forward to each month with a set of decorated activity envelopes. The ideas can be inexpensive: visit a new park, try a recipe, explore a library branch, or invite someone over for coffee.
Supplies: Twelve envelopes, cardstock, pens, washi tape, and a small storage box.
How to make it: Label an envelope for each month and decorate the fronts. Write one manageable activity on a card for each envelope, considering the season and your budget. Arrange them in order in the box and open one at the start of each month.
32. A Letter-to-Yourself Keepsake Folder
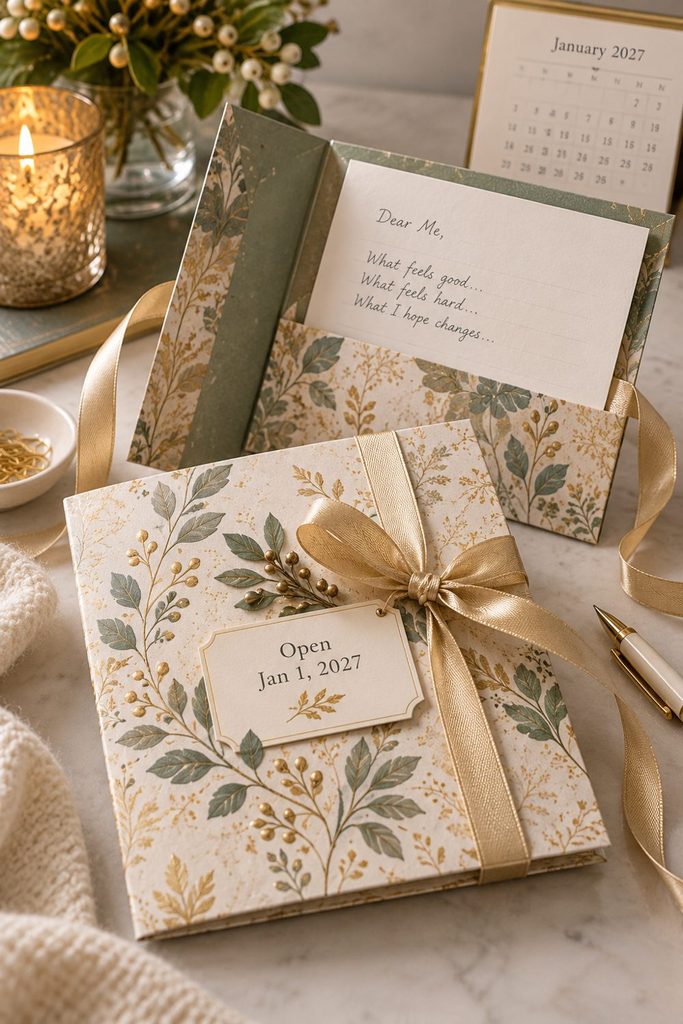
Finish your craft session with a small folder for a letter you’ll read at the end of the year. Give yourself room to write honestly about what feels good, what feels hard, and what you hope changes.
Supplies: Heavy cardstock, decorative paper, scissors, glue, writing paper, and ribbon.
How to make it: Fold cardstock into a folder slightly larger than your letter paper. Glue a narrow paper pocket inside, attaching only its sides and bottom. Decorate the cover, write your letter, and tuck it into the pocket. Tie the folder closed with ribbon and mark it with the date you plan to open it.
How to Host a New Year’s Craft Night
Useful supplies for the table: cardstock, scissors, ribbon, tissue paper, washi tape, letter stickers, star stickers, glue sticks, metallic markers, craft trays. Check what you already have before shopping; several projects use the same basics.
Choose one main project and one easy extra so guests can settle in without feeling rushed. Word bracelets and bookmarks work well together; a party-decorating evening could pair paper stars with place cards. Make one sample beforehand so everyone can see what they’re working toward.
- Set out shared supplies in the middle. Give each person their own small tray or paper placemat for loose beads and scraps.
- Prepare the fiddly parts. Cut templates, print photos, or sort letter beads before guests arrive.
- Account for drying time. Save projects that need a long cure for a separate afternoon, or provide a way to carry them home flat.
- Keep refreshments nearby. A separate snack spot leaves more room for making and keeps drinks away from paper projects.
- Leave room for personal choices. A few coordinated colors help the table look pulled together, while different words and details make each piece personal.
Frequently Asked Questions
What are easy New Year’s crafts for adults who don’t craft often?
Start with a memory jar, decorated journal, folded place cards, or monthly adventure envelopes. These use straightforward cutting, writing, and gluing, and you can keep the designs as simple as you like.
What can I make for a New Year’s Eve party?
Paper star garlands, disco ball place card holders, glass charms, and photo booth props all have a clear job at the party. Choose one table project and one backdrop decoration for a coordinated look without taking on too much.
How can I make New Year’s crafts on a budget?
Start with clean jars, leftover ribbon, plain notebooks, packaging cardstock, and supplies you already own. Pick one metallic accent and repeat it across the projects instead of buying a different set of embellishments for each craft.
Which crafts can I keep using after New Year’s Eve?
Memory jars, calendars, journals, bookmarks, word bracelets, and intention tokens can stay useful throughout the year. For reusable party decorations, choose stars and metallic finishes without adding a specific year.
Pick the project you’d enjoy making most, whether that’s a glittering garland for a room full of friends or a quiet keepsake for yourself. A little time spent creating can be a lovely way to close one year and welcome the next.