10 Christmas Handprint Crafts That Turn Little Hands Into Lasting Keepsakes
Quick Answer: The best Christmas handprint crafts include salt-dough ornaments, painted canvas keepsakes, handprint reindeer cards, and clay handprint plaques. Each takes 15–30 minutes, uses supplies you likely already own, and turns your child’s current size into a treasured holiday memory.
There’s something about a tiny handprint pressed into dough or paint that stops you in your tracks — it’s proof of exactly how small they were this year, and it won’t last.
These ten ideas span every mess tolerance and skill level, from five-minute paper projects to slow-dry clay keepsakes worth framing. Pick the ones that fit your afternoon, and let’s get those little hands moving.
Heads up: This post may include affiliate links. As an Amazon Associate, I earn from qualifying purchases—at no extra cost to you. Full privacy policy and disclosure here.
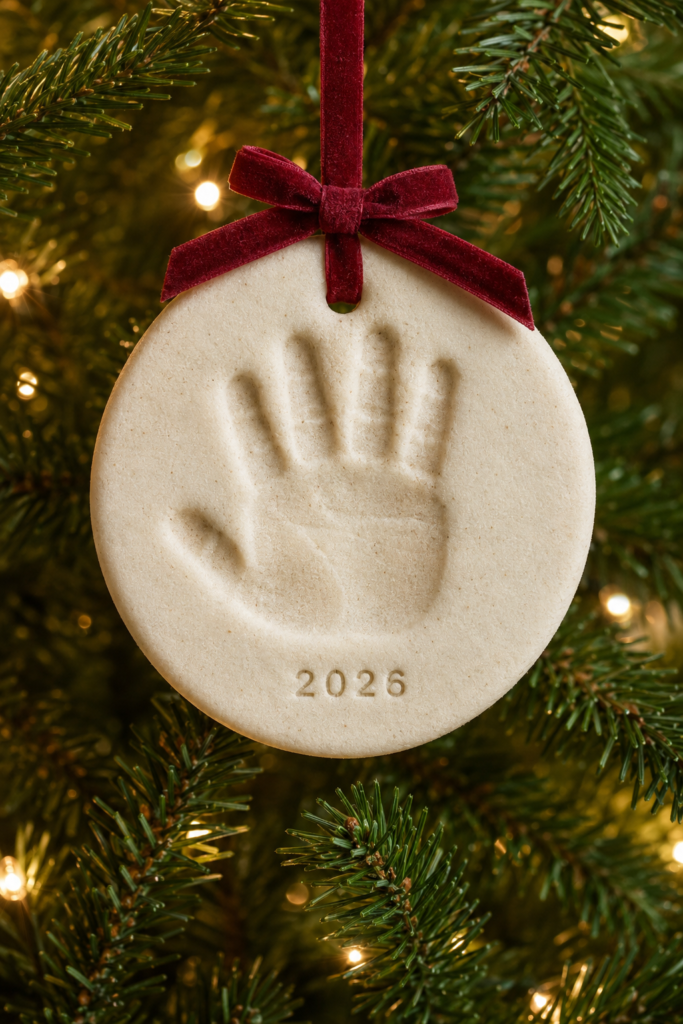
This is the one grandparents actually keep in a drawer for decades. The dough holds every crease and dimple of a baby’s palm, and once baked and painted, it becomes a genuinely durable ornament rather than a craft that falls apart by January.
How to Make It
- Mix 2 cups flour, 1 cup salt, and ½ cup water. Knead until smooth (or use a salt-dough kit).
- Roll the dough to about ¼-inch thickness on a floured surface.
- Press your child’s hand firmly and evenly into the dough.
- Trim around the print, leaving a small border, and smooth any rough edges.
- Poke a hanging hole near the top with a straw.
- Bake at 250°F for 2–3 hours until completely hard, then let cool fully.
- Paint and add the year once cool, then seal with polyurethane.
- Thread with baker’s twine or ribbon.
Why You’ll Love It
It costs almost nothing, uses pantry basics, and gives kids a decoration they can proudly hang on the tree every year.
Styling Tips
Keep the shapes thick—about ¼ inch—so they bake sturdily without becoming too bulky. Use a salt-dough ornament kit or rolling pin set to make quick work of rolling and cutting, poke the hanging hole with a straw before baking, and finish each ornament with baker’s twine or a festive ribbon.
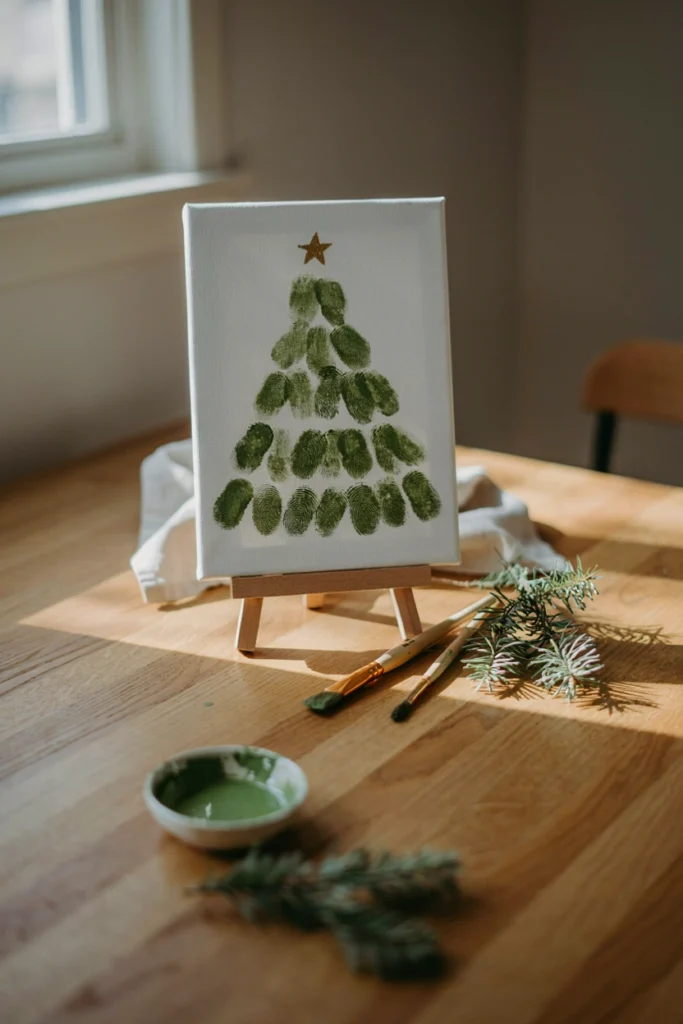
Stack handprints in overlapping rows and the fingers naturally read as tree branches — no drawing skill required. It’s the rare craft that looks intentionally designed rather than obviously handmade.
How to Make It
- Brush a layer of green washable tempera paint onto your child’s palm and fingers.
- Press the handprint near the bottom of the canvas, fingers pointing outward, to form the widest row.
- Repaint the hand and press a second, slightly smaller row just above the first, overlapping the fingertips.
- Continue adding rows, each a bit smaller and higher, working up to a point at the top.
- Let each row dry for a few minutes before adding the next so prints don’t smear.
- Dip a fingertip in gold or yellow paint and press a single fingerprint at the very top for the star.
- Let the canvas dry fully before displaying.
Best For
Families with more than one child, since siblings’ prints can layer into a single tree that captures everyone at once. A small stretched canvas multipack keeps the cost per project low if you want to make one for each grandparent.
Good to Know
Let each layer of paint dry for a few minutes between prints, or the rows will smear into each other. A washable tempera paint set gives you the widest color range and rinses easily off little hands.
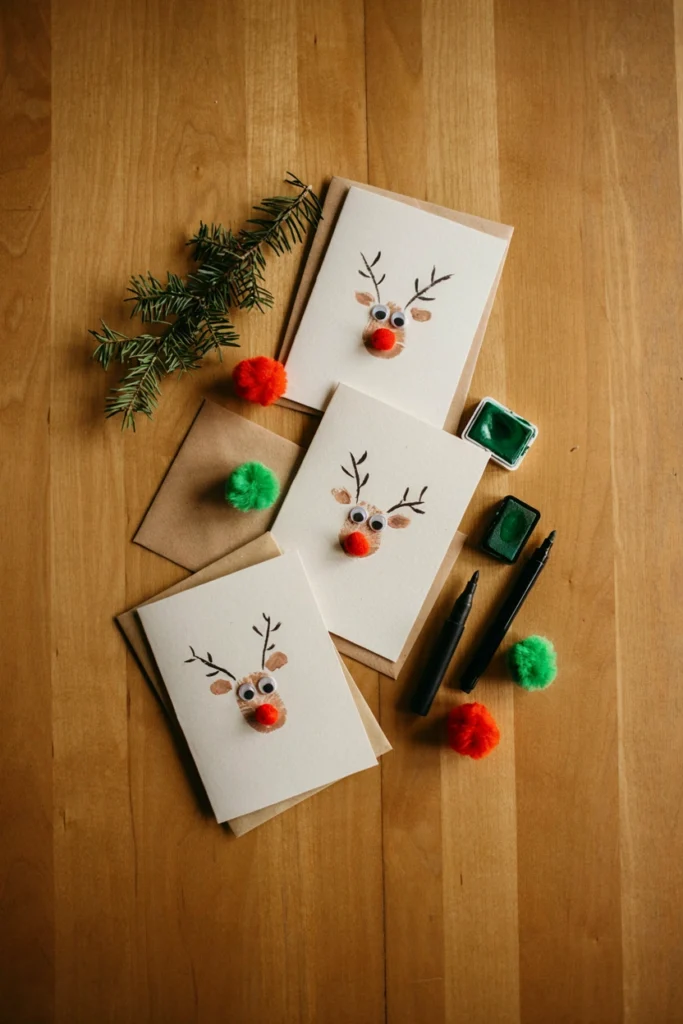
Skip the whole hand and go smaller — a single thumbprint becomes a reindeer face in under a minute, which makes this the fastest project on the list and genuinely doable with a toddler’s patience span.
How to Make It
- Fold a piece of cardstock in half to make a blank card.
- Press your child’s thumb onto a brown washable stamp pad, then stamp it onto the front of the card.
- Let dry for a minute or two.
- Glue on two small googly eyes above center.
- Glue on a small red pom-pom for the nose.
- Bend a short pipe cleaner into a V shape and glue it above the eyes for antlers.
- Let dry flat before writing your message inside.
Why You’ll Love It
You end up with a stack of cards for teachers, grandparents, and neighbors without a single trip to the store.
Budget Tip
Use non-toxic washable stamp pads instead of paint — no drying time, no cleanup, and the print is crisper.
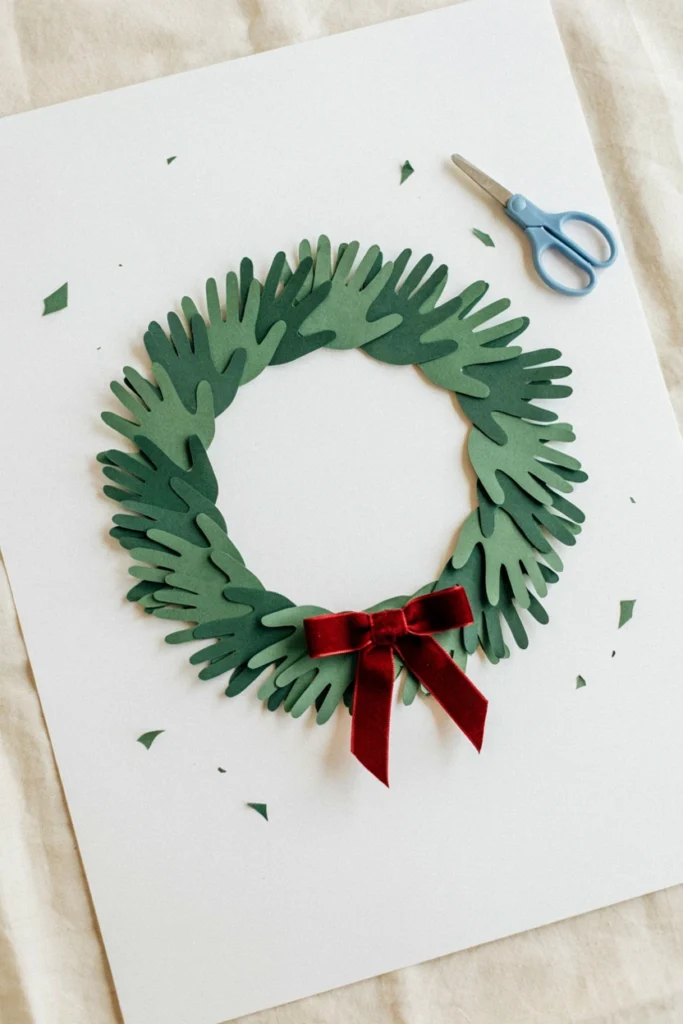
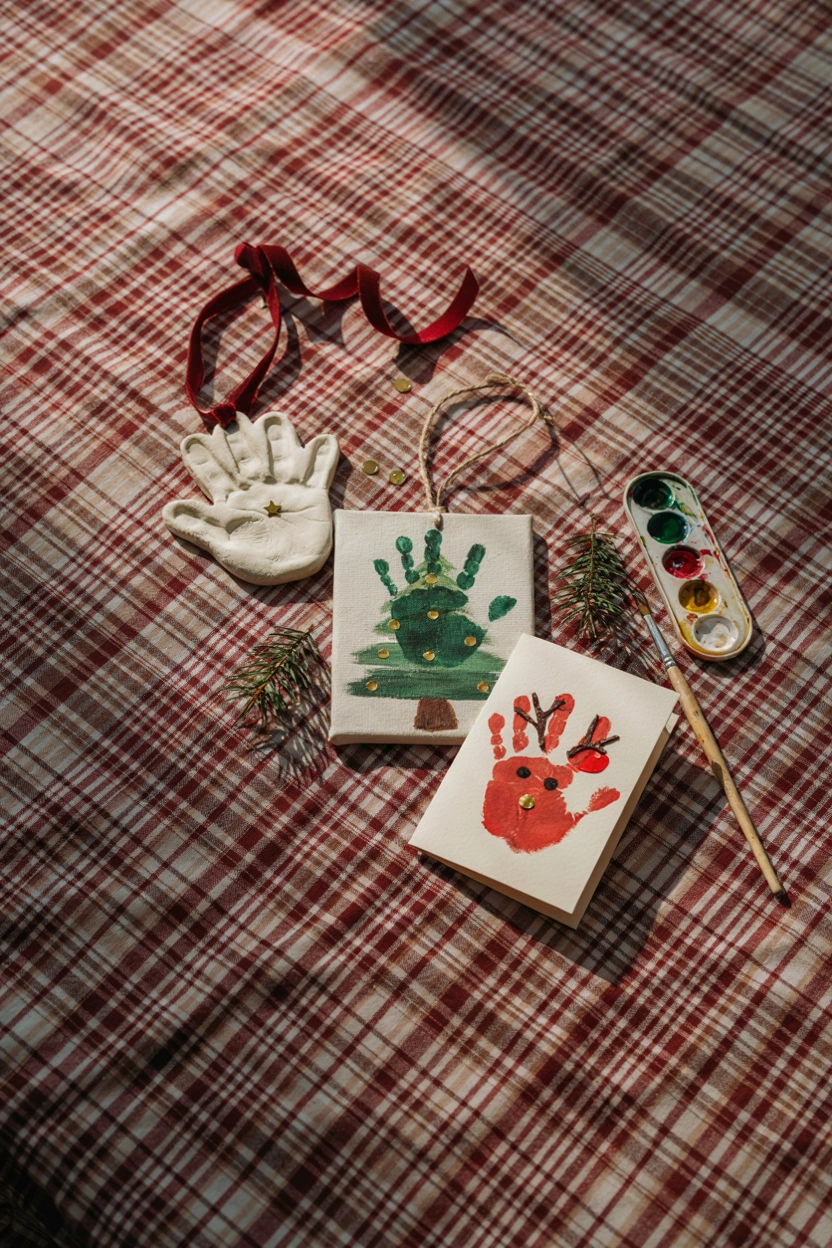
Trace and cut instead of paint if mess is a dealbreaker — a wreath made of layered paper handprints looks just as festive and survives being mailed flat in an envelope.
How to Make It
- Trace your child’s hand onto green cardstock 10–12 times (or as many as needed to fill a ring).
- Cut out each handprint.
- Cut a ring shape out of a paper plate or cardstock as the wreath base.
- Glue the handprints around the ring, overlapping each one slightly and alternating the angle for a fuller look.
- Let the glue dry flat.
- Tie a red bow at the bottom or top of the wreath.
Best For
Sending as a gift to out-of-town family who can’t be there to make it in person.
Pair It With
A handwritten note on the back listing your child’s age and favorite thing about Christmas that year.
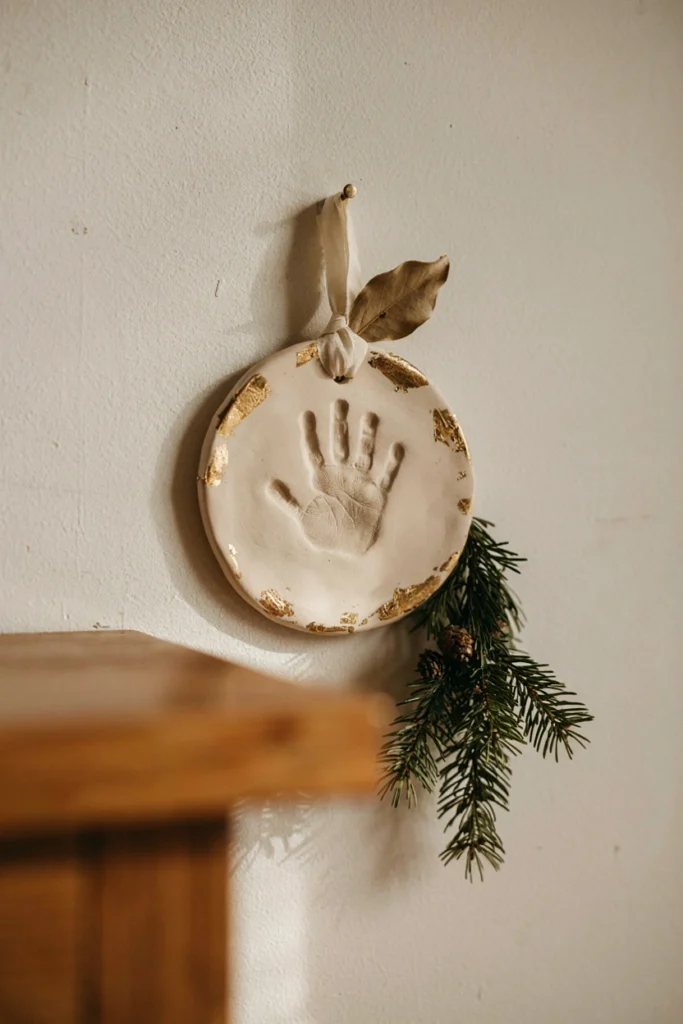
Unlike paint-based crafts, clay captures dimension — you can actually see the depth of each finger, not just its outline. It’s the closest a handprint craft gets to a museum-quality keepsake.
How to Make It
- Roll air-dry clay into a ball, then flatten into a disc about ½-inch thick.
- Smooth the edges with your fingers or a rolling pin.
- Press your child’s hand firmly and slowly into the center, then lift straight up to keep the impression clean.
- Poke a hanging hole near the top edge with a straw.
- Let air-dry for 24–48 hours on a flat surface, flipping once partway through.
- Paint gold (or your color of choice) once fully dry.
- Seal with clear matte spray and thread with ribbon.
Worth the Splurge?
A quality air-dry clay costs a few dollars more than dough but won’t crack or shrink the way homemade recipes sometimes do.
Good to Know
Clay takes 24–48 hours to fully dry, so plan this one for a weekend, not a weeknight.

Turned sideways with the fingers spread, a white handprint becomes a snowman’s rounded body almost by accident — one of those crafts where the shape does most of the work for you.
How to Make It
- Paint your child’s palm and fingers white.
- Press the hand sideways onto a blue ornament, fingers curled slightly inward, so the palm forms a rounded body.
- Let dry for 10–15 minutes.
- Add two small black dots for eyes and a tiny orange triangle or dot for the nose.
- Glue a small scrap of felt around the “neck” area as a scarf.
- Let dry fully before hanging.
Why It Stands Out
Most handprint crafts stay upright; flipping the orientation here is what makes it feel fresh instead of repetitive.
Styling Tips
Add a mini scarf from a scrap of felt for texture the paint alone can’t give you.
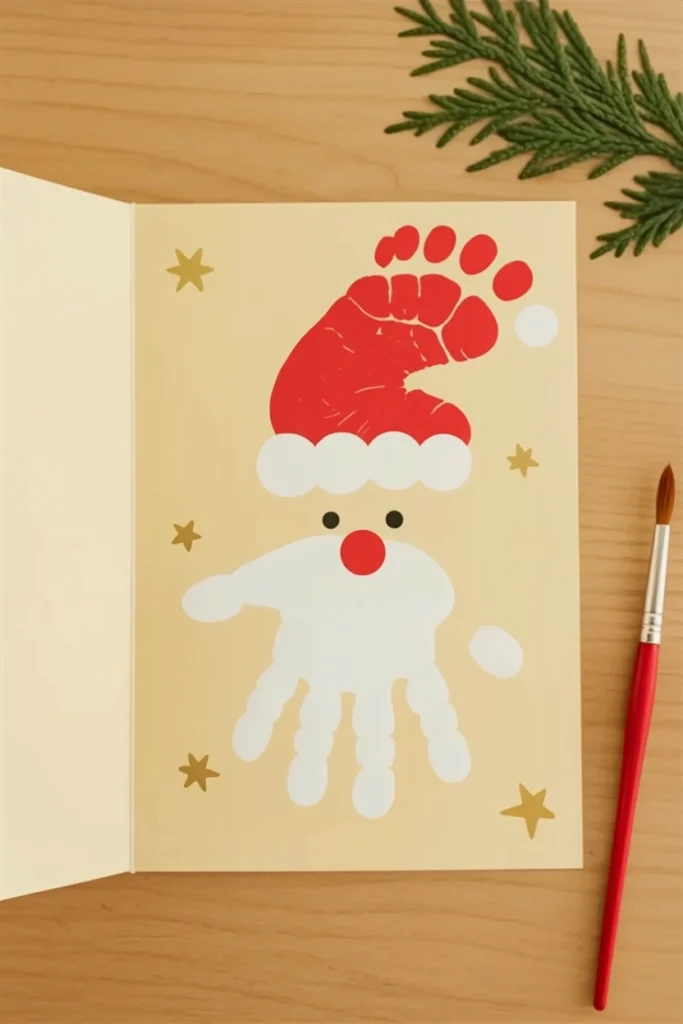
Combining foot and hand into one design is the most photo-worthy option here — it takes real coordination to pull off and results in a card that looks far more elaborate than the actual effort involved.
How to Make It
- Fold a piece of cardstock in half to make a blank card.
- Paint your child’s foot red and press it onto the card at an angle, toes down, to form Santa’s hat and body.
- Let dry for a few minutes.
- Paint your child’s palm and fingers white and press it just below the heel of the footprint, overlapping slightly, to form the beard.
- Let dry fully.
- Add a small white dot at the tip of the footprint for the hat’s pom-pom, and small dots for eyes on the beard.
Best For
Babies and young toddlers, since footprints are often easier to capture cleanly than an open palm.
Mom Tip
Do the footprint first while your child is calmest — it’s the trickier of the two to get in one clean press.
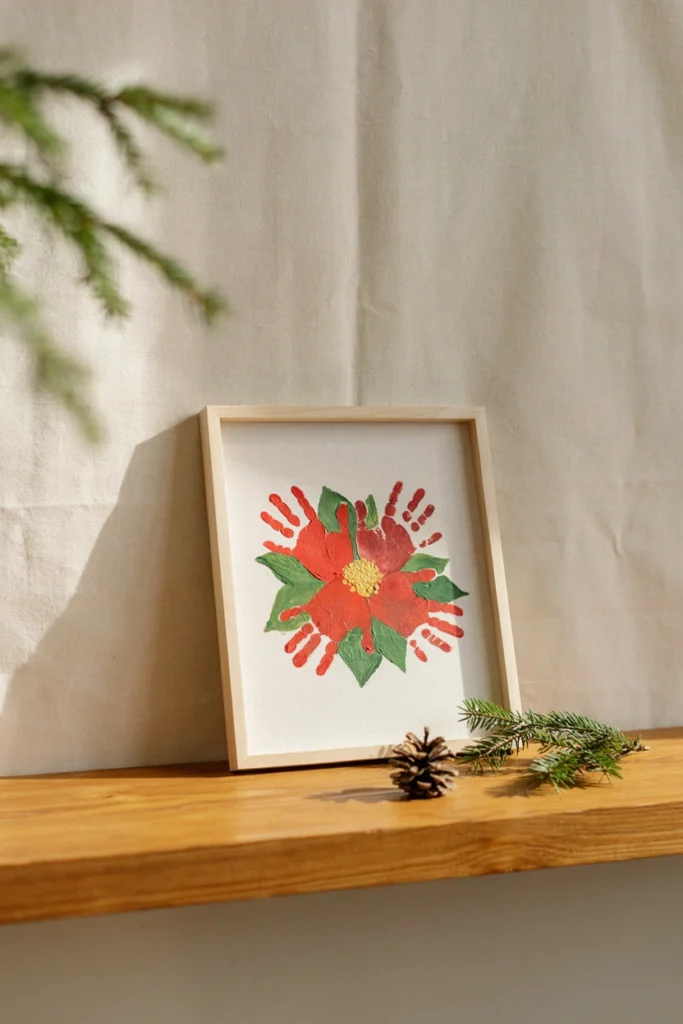
Arrange five or six handprints in a radial pattern and the fingers become petals — it’s a craft that photographs beautifully framed on its own, without needing any additional embellishment.
How to Make It
- Paint your child’s palm and fingers red.
- Press one handprint onto the canvas, fingers pointing outward from a center point.
- Rotate the canvas slightly (not the child’s hand), repaint, and press another handprint overlapping the first at the base.
- Repeat 4–6 times, rotating the canvas each time, until the handprints form a full circle of “petals.”
- Let dry for 10–15 minutes.
- Dip a fingertip in yellow paint and dab several dots in the center to finish the flower.
Why You’ll Love It
It doubles as genuine wall art, not just a seasonal decoration you pack away in January.
Good to Know
Work on one hand at a time and rotate the canvas rather than the child — it keeps the petal spacing even.

This is the low-commitment option for parents who want the sentiment without a full craft session — a handprint the size of a gift tag takes seconds and instantly upgrades every present under the tree.
How to Make It
- Lay out a set of kraft gift tags on a protected surface.
- Paint your child’s palm and fingers with a small amount of paint (a full hand is often too big for one tag—consider just a thumbprint for smaller tags).
- Press onto each tag, one at a time, repainting as needed.
- Let dry for a few minutes.
- Write your child’s name and the year beneath each print.
- Thread the twine and attach to gifts.
Best For
Parents juggling holiday wrapping who still want something handmade to attach to gifts.
Budget Tip
Skip buying blank tags — a set of kraft gift tags with twine comes ready to write on and already has the holes punched, so all you need is the handprint.

Combine a photo from this Christmas with a ring of handprint dots around the ornament’s edge, and you get two keepsakes — a face and a hand — in one hanging piece.
How to Make It
- Print and trim a small photo to fit inside a clear plastic fillable ornament.
- Open the ornament and insert the photo, then snap the two halves back together.
- Dip your child’s fingertip in paint and dot it around the outer edge of the ornament in a ring.
- Let dry for 15–20 minutes.
- Attach a ribbon or string loop for hanging.
Why It Stands Out
It’s the only entry on this list that captures both what your child looked like and how big their hand was, side by side.
Pair It With
Clear plastic fillable ornament balls — inexpensive and reusable year after year.