10 Christmas Crafts Made With Unusual Items You Already Have at Home
Quick Answer: The most unusual Christmas crafts use everyday items already in your home — wine corks, coffee filters, old book pages, CDs, egg cartons, buttons, and light bulbs. These repurposed materials turn into ornaments, wreaths, and centerpieces that look nothing like typical mason-jar crafts, and most cost you nothing to make.
Every year the same “unusual craft” roundups show up with the same mason jars and twine, just photographed differently. If you’ve made those already, you’re not looking for more of the same — you’re looking for something people actually stop and ask about at your next gathering.
The good news is you probably don’t need to buy a single thing. Your recycling bin, junk drawer, and that box of mismatched buttons in the closet are full of raw material for genuinely surprising Christmas decor — and if the kids or teens in your house are looking for something to do this season, these double as an easy teen Christmas party activity too.
Heads up: This post may include affiliate links. As an Amazon Associate, I earn from qualifying purchases—at no extra cost to you. Full privacy policy and disclosure here.

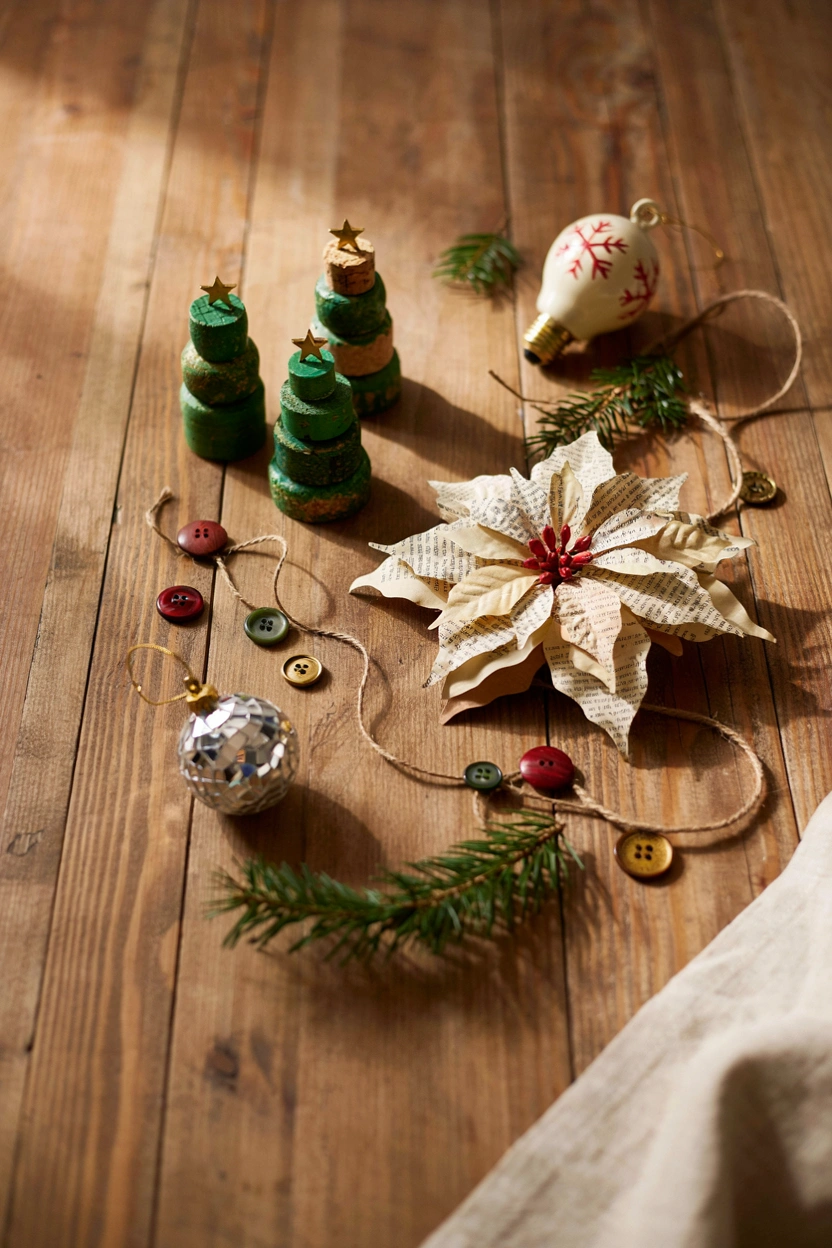
A pile of saved corks becomes a forest of tiny trees, each one glued cork-by-cork into a tapering pyramid and finished with a dab of gold paint at the top. The uneven, natural texture of the cork gives them a rustic charm no plastic tabletop tree can fake, and a cluster of five or six on a mantel reads like an intentional design choice, not a craft project.
How to Make It
- Sort corks by size — you’ll want one large cork for the base row and progressively smaller ones toward the top.
- Glue a row of 3–4 corks side by side, standing upright, for the base.
- Glue a second, slightly smaller row on top, centered over the first.
- Continue stacking smaller rows until you reach a single cork at the top.
- Let the glue set for a few minutes between rows so the stack stays stable.
- Dab gold paint on the very top cork, or glue on a tiny wood star.
- Let dry fully before displaying.
Why You’ll Love It
They use up corks that would otherwise sit in a jar forever, and the natural variation in cork color means no two trees look identical. If you don’t have enough saved up, a bag of natural wine corks gets you started without waiting a year to collect your own.
Styling Tips
Group trees in odd numbers and varying heights for visual interest. A light dusting of fake snow (or even flour, for a one-day display) on the “branches” sells the effect instantly. For a cleaner finish than a dab of paint, top each tree with a tiny unfinished wood star.
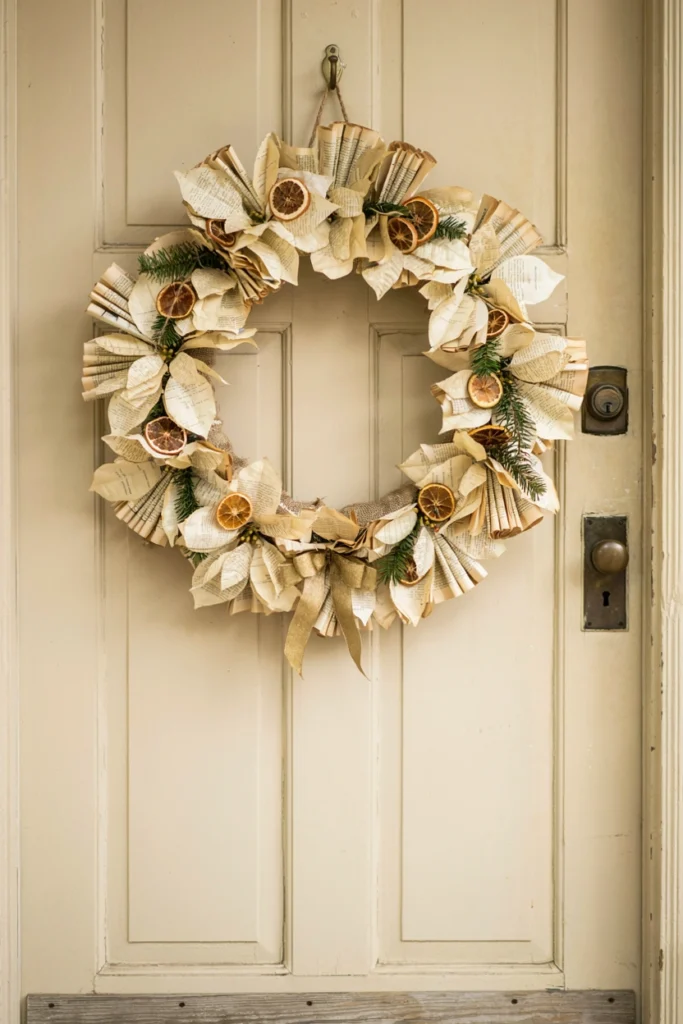
Pages from a damaged or thrifted book get rolled, curled, and layered into poinsettia blooms with a warm, sepia-toned glow that no printed craft paper can replicate. The typography peeking through the curled petals gives guests something to lean in and notice.
How to Make It
- Tear out pages from a damaged or thrifted book — you’ll need 8–10 pages per flower.
- Cut each page into a petal shape, roughly teardrop or leaf-shaped, about 3–4 inches long.
- Curl each petal by rolling it gently around a pencil or wrapping it around your finger, then releasing.
- Layer 5–6 curled petals in a circle, gluing the narrow ends together at the center.
- Add a second, smaller layer of petals on top, offset from the first layer.
- Glue a small button or paper circle in the very center to finish.
- Let dry, then arrange onto a wreath form or display individually.
Why It Stands Out
Where most paper flowers use crisp white or colored cardstock, the aged, slightly worn texture of book paper reads as vintage and intentional rather than “leftover paper.”
Good to Know
Never cut up a book with resale or sentimental value — thrift store dollar bins and damaged library discards are the right source material here.

Real filament light bulbs, hand-painted and hung upside down by their base, create ornaments with an industrial-vintage silhouette you won’t find at any store. The bulb shape itself — bulbous and slightly irregular — is the whole appeal; the paint just adds color.
How to Make It
- Wipe down burned-out bulbs (or battery-powered LED decorative bulbs) to remove dust.
- Apply a base coat of acrylic or craft paint to the glass portion, leaving the metal base unpainted.
- Let dry, then add a second coat if needed for full coverage.
- Optional: add a contrasting color accent near the base with a small brush.
- Let paint cure fully, about 1–2 hours.
- Wrap a small loop of wire or string around the metal base to create a hanger.
- Hang upside down by the base.
Best For
Farmhouse and vintage-industrial tree themes, especially paired with copper wire garland or Edison-bulb string lights.
Good to Know
Skip real burned-out bulbs near heat sources or candles. For the identical look with zero fire risk, battery-powered LED decorative bulbs paint and hang exactly the same way. If you’d rather skip glass altogether, clear fillable plastic ornament balls are a sturdier, kid-safe base for a similar hand-painted look.

Basic coffee filters, folded in sixths and snipped like paper snowflakes, unfurl into soft, slightly translucent shapes that catch light in a way construction paper never does. Hung in a graduated garland across a window, they cast a delicate lace-like shadow across the room by afternoon.
How to Make It
- Flatten a basket-style coffee filter and fold it in half, then in half again, then once more into a wedge shape (sixths).
- Snip small triangles, curves, and notches along the folded edges, leaving some solid paper between cuts.
- Unfold carefully to reveal the snowflake pattern.
- Flatten under a book for a few minutes if the paper is curling.
- Repeat to make a variety of sizes.
- String onto twine or ribbon at varying heights to create a garland, using a dab of glue to hold each filter in place.
Why You’ll Love It
Nearly every kitchen has a stack of these sitting in a cabinet, and the round, ruffled edge of the filter gives the snowflakes a softer, more organic look than perfectly symmetrical paper ones. A pack of white basket-style coffee filters is cheap enough to make dozens without a second thought.
Budget Tip
A single sleeve of filters makes a dozen or more snowflakes — likely the least expensive entry on this entire list.
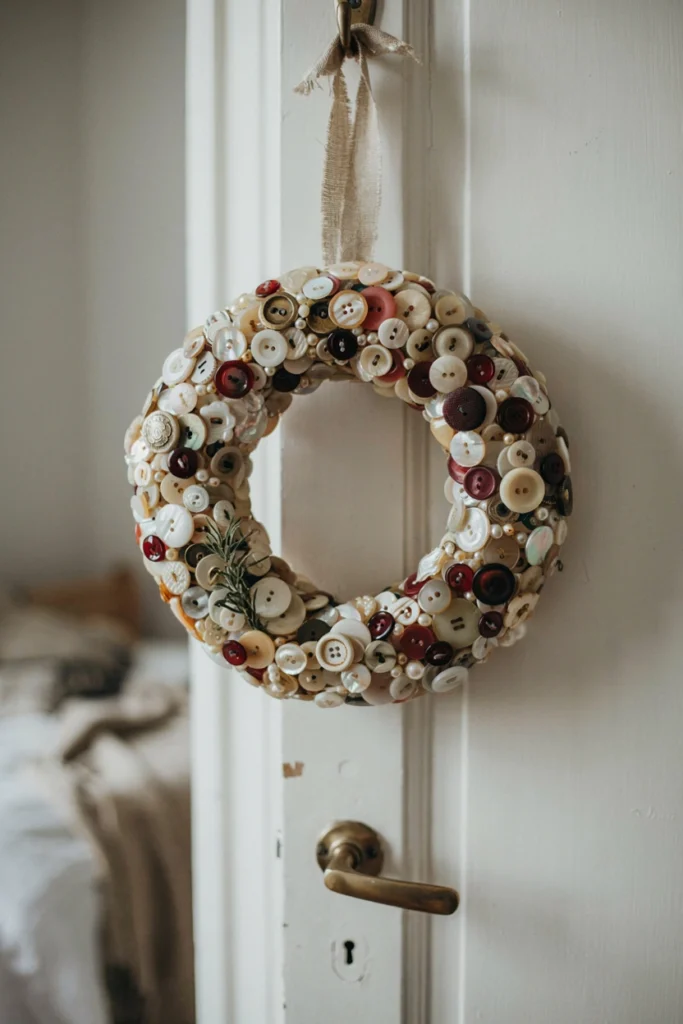
A jar of mismatched buttons — the kind every household accumulates and never sorts — gets hot-glued dense and edge-to-edge onto a foam wreath form until not a scrap of foam shows through. The result is tactile and jewel-like, with tiny glints of brass and mother-of-pearl catching the light differently from every angle.
How to Make It
- Sort your buttons loosely by size and color so you can balance them as you go.
- Starting at the outer edge, hot-glue buttons onto a foam wreath form, working in small sections.
- Overlap buttons edge-to-edge so the foam doesn’t show through, mixing sizes and colors as you fill each section.
- Work your way around the entire ring, then fill the inner edge the same way.
- Fill any gaps with smaller buttons.
- Let the glue fully set before hanging.
- Loop a length of burlap ribbon through the back for hanging.
Why It Stands Out
Unlike ribbon or floral wreaths, this one rewards a close-up look — guests genuinely lean in to see the individual buttons. If your own button jar is thin, an assorted vintage-style button collection fills it out fast.
Pair It With
A thin length of burlap ribbon looped at the top keeps the focus entirely on the buttons rather than competing with them. Start with a sturdy foam wreath form so the buttons have an even base to grip.

Scratched, unwanted CDs get cut into small mosaic pieces and glued shard-by-shard around a foam ball to build a fully mirrored ornament that throws light across the whole room. Under string lights, the effect is closer to a miniature disco ball than anything typically hung on a Christmas tree.
How to Make It
- Wearing gloves, cut old CDs into small irregular shards using sturdy scissors.
- Insert a ribbon loop into a foam ball for hanging before you begin gluing.
- Apply hot glue to a small section of the foam ball and press a CD shard into place, mirror-side out.
- Continue gluing shards edge-to-edge, working in small sections around the entire ball.
- Leave tiny gaps between shards rather than forcing them flush — this keeps the mosaic look clean.
- Let the glue set fully before hanging.
Why It Stands Out
It’s the single most reflective, light-catching material on this list — nothing else here moves and sparkles the way a mirrored surface does.
Good to Know
Wear gloves when cutting CDs — the edges are sharp, and this one is best done by an adult rather than handed to young kids.
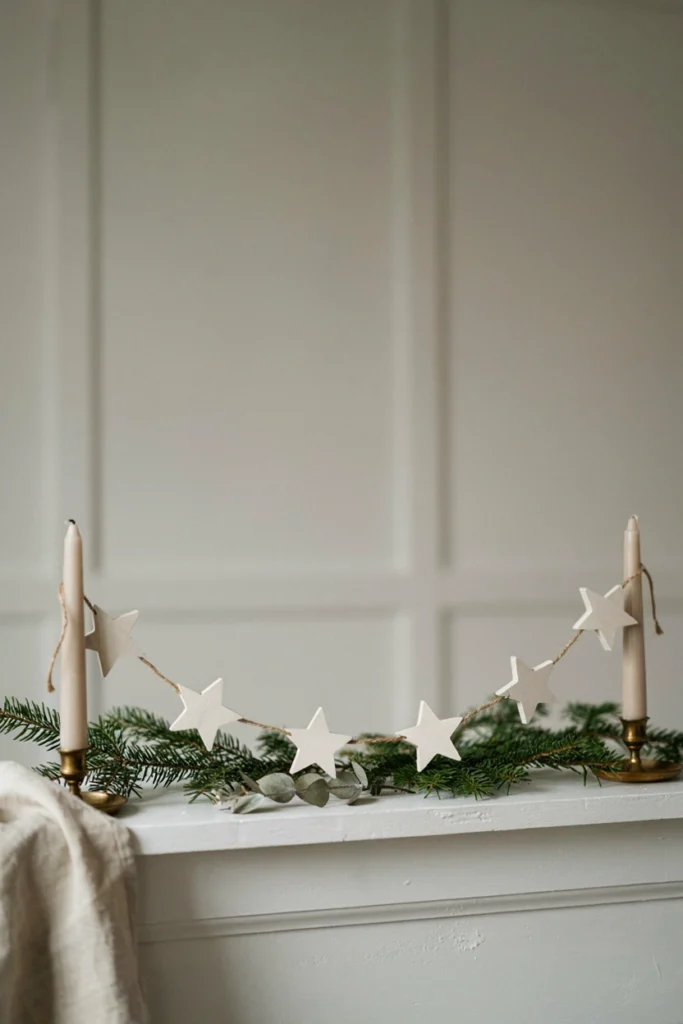
The plain cardboard back of a cereal box — sturdier than construction paper and already the right thickness — gets cut into star shapes, painted a single matte color, and strung into a garland with a clean, uncluttered silhouette. Because the shapes are cut freehand, no two stars are perfectly identical, which reads as handmade rather than sloppy. For more ideas on stringing pieces like this together, our Christmas garland ideas roundup has plenty of styling inspiration.
How to Make It
- Break down an empty cereal box and flatten the plain cardboard side.
- Freehand-draw star shapes in varying sizes, or trace a star stencil.
- Cut out each star.
- Paint one side of each star a single matte color and let dry.
- Punch a small hole near the top point of each star.
- Thread twine or string through each hole, spacing the stars evenly along the length.
- Hang the garland across a mantel or window.
Why You’ll Love It
Cardboard is sturdy enough to survive a full season on display and into storage, unlike thinner paper crafts that crease and tear.
Best For
Minimalist, monochrome tree themes where a single paint color needs to carry the whole look.
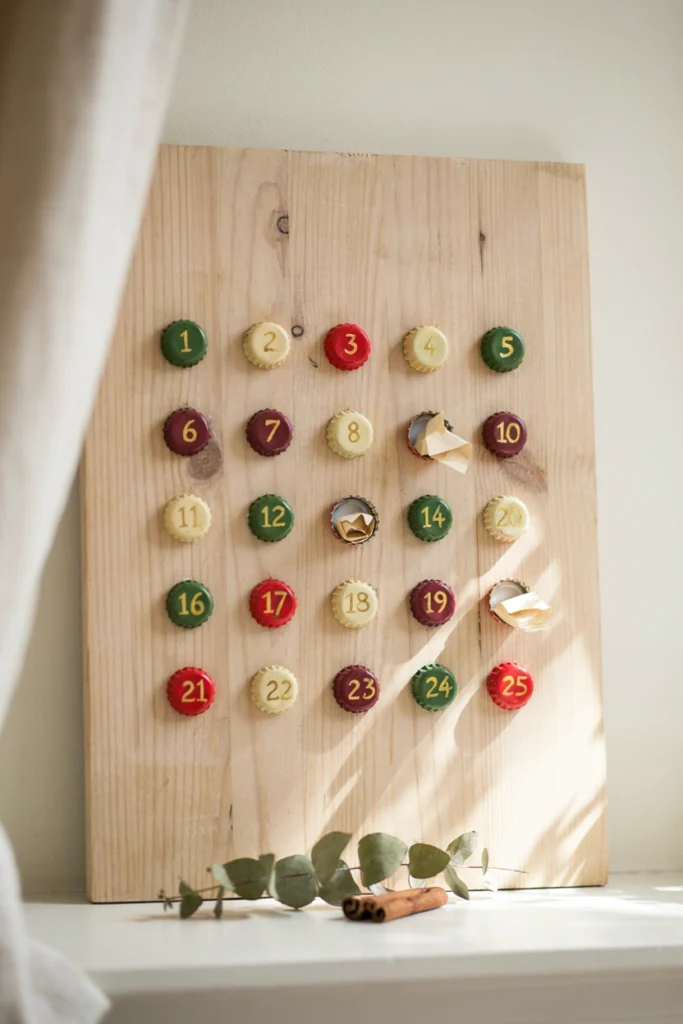
Saved metal bottle caps, painted and numbered one through twenty-five, get mounted in a grid on a scrap board with a small magnet glued inside each one to hold a folded note or tiny treat. The uneven, slightly dented character of real bottle caps gives the whole piece a lived-in, collected-over-time feel rather than a store-bought calendar’s uniform plastic doors.
How to Make It
- Wash and dry 25 bottle caps.
- Paint the inside of each cap a base color and let dry.
- Write or paint numbers 1–25 on the caps, one number each.
- Glue a small magnet inside each cap, or a strip of magnetic tape on the back if mounting flat on metal.
- Arrange the caps in a 5×5 grid (or your preferred layout) on a scrap wood board, marking positions lightly in pencil first.
- Glue or magnet-mount each cap in its spot.
- Tuck a folded note or small treat behind each cap each night of Advent.
Why It Stands Out
It’s reusable every year and gets more charming with each season’s wear, unlike disposable cardboard advent calendars.
Budget Tip
Ask friends to save caps for a few months if your own collection falls short — twenty-five adds up faster with a little help.
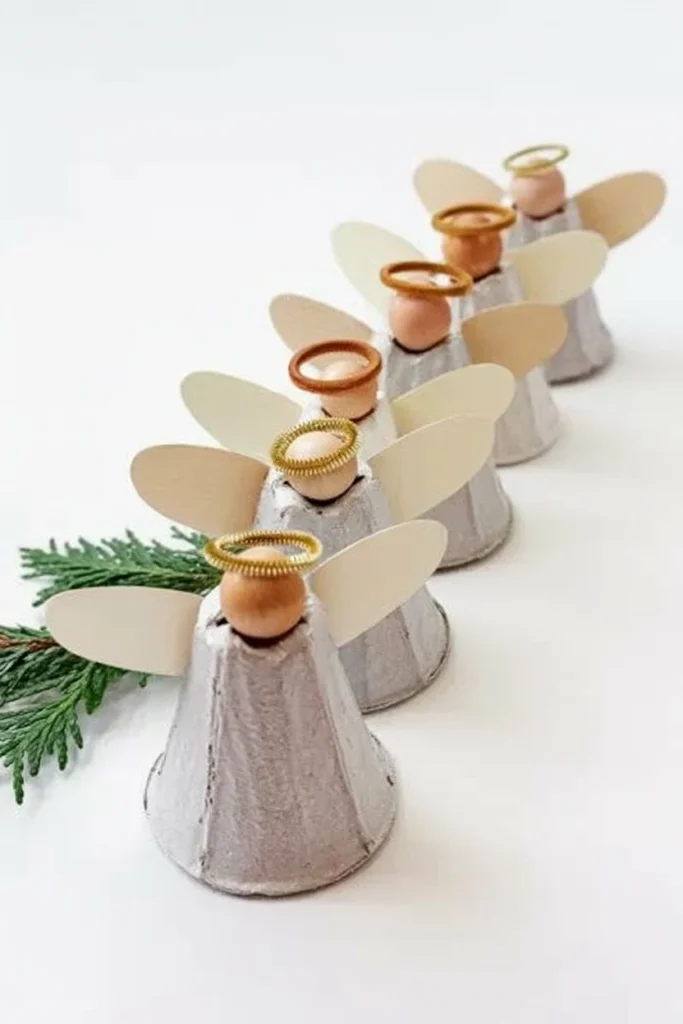
A single cup cut from a cardboard egg carton becomes an angel’s flared skirt once painted white and topped with a wooden bead head, paper wings, and a bent pipe-cleaner halo. The carton’s natural ridges and dimples show through the paint, giving each angel a soft, slightly imperfect texture that feels handmade rather than uniform.
How to Make It
- Cut a single cup out of a cardboard egg carton and trim the edges so it stands evenly.
- Paint the cup white, inside and out, and let dry.
- Glue a wooden bead onto a toothpick or small stick, then insert it into the top of the cup to form the head.
- Cut two simple wing shapes from paper or cardstock and glue them to the back of the cup.
- Bend a short piece of pipe cleaner into a loop and glue it above the head as a halo.
- Let everything dry fully before displaying.
Why You’ll Love It
It’s genuinely one of the fastest and most forgiving crafts on this list — great for an evening with young kids who want to see quick results.
Best For
Family craft nights and classroom Christmas parties where a group needs to make several at once.
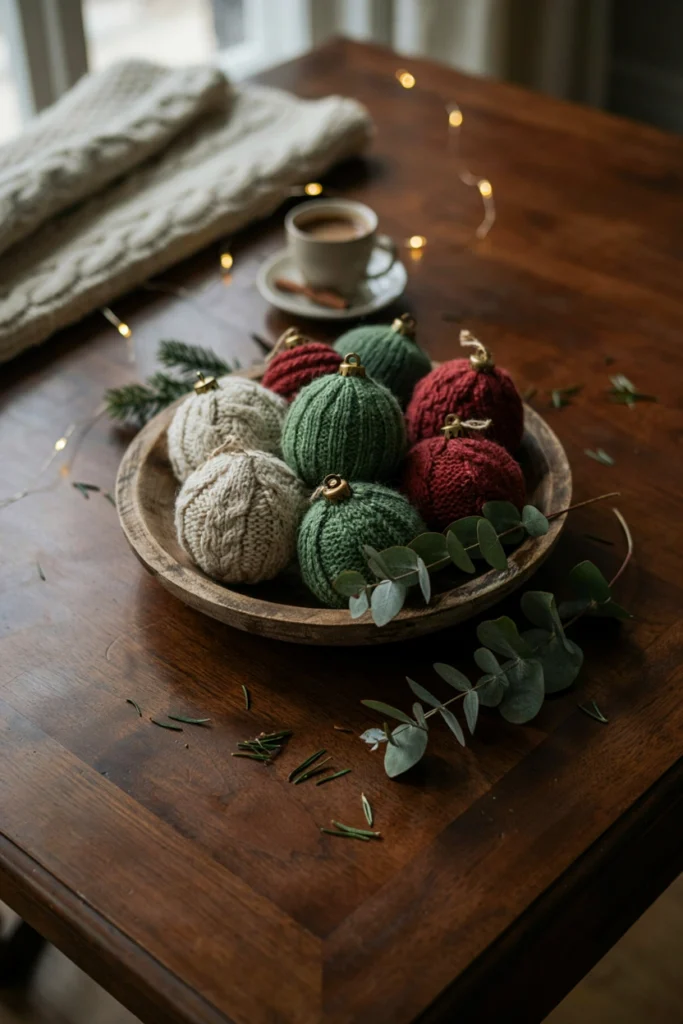
A worn-out sweater, cut into squares and stretched tightly over a foam ball with the seam tucked underneath, turns into a chunky knit ornament with real cable-knit texture — something no smooth plastic ornament can imitate. Piled together in a bowl or scattered across a mantel, they bring the same cozy, tactile warmth as the sweater itself. For more ways to bring this cozy texture to your entryway, check out our Christmas porch decor ideas.
How to Make It
- Cut a square of sweater fabric large enough to fully wrap around a foam ball with a few inches to spare.
- Center the foam ball on the fabric square.
- Pull the fabric up and around the ball tightly, gathering the excess at one point.
- Twist and tuck the gathered fabric underneath, securing with a hot glue dab or a rubber band.
- Trim any bulky excess fabric from the gathered seam.
- Glue a ribbon loop over the tucked seam for hanging.
Why It Stands Out
The texture is the entire appeal here — nubby, ribbed, and touchable in a way that sets it apart from every glossy ornament nearby.
Pair It With
A few sprigs of real or faux eucalyptus tucked into the bowl plays up the cozy, textural feel even further.